
Free Women's Rights Applique Pattern
/Fan of women's rights? Let the world know! This free appliqué pattern can be hung as a banner on the wall of your home or office—or even right on your own front door. (That's where I put mine!)
The finished appliqué banner measures 20" wide and 26" tall and with only three pieces, it's not fussy and works up fast.
Ok. Enough words. Let's get stitching!

Materials for Appliquéing the Women's Rights Banner
canvas (or duck) fabric measuring at least 21 x 53 inches
large scraps of cotton quilting fabric (or similar) in at least three colors/patterns
fusible web (Pellon, Heat ‘n Bond, or equivalent)
coördinating thread (I used Sulky 12 wt. thread so it would really show up.)
removable pen or marker
scissors
pins
sewing machine
iron
cutting mat
wooden dowel: 1/2-inch wide and 22-inches long (a decently straight stick or branch also works—use what you’ve got!)
ribbon, rope, string, etc. for hanging

Instructions for Appliquéing a Women's Rights Banner
You can choose to use a single color for the appliqué design, or three like I did in this example. Who says you can't have choices?
Step 1: Prep the Pattern
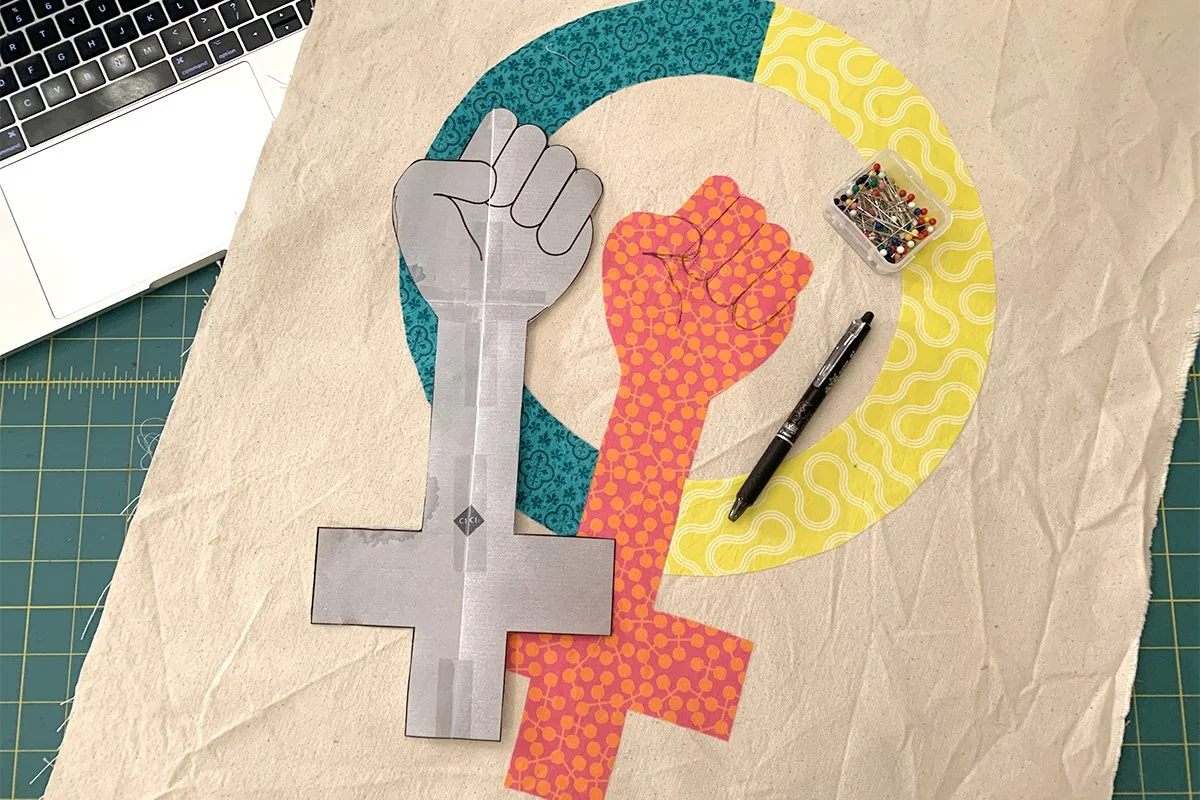
Download the pattern and print pages 5-8 at 100% scale. Tape the four pages together as shown, carefully lining up the guide marks, then cut out each of the three pieces:
The left side of the cirlce
The right side of the circle
The hand with the + symbol
***Note: The “thumb” and “finger” outlines are top-stitched only. They are not individual pieces.

Step 2: Cut Out the Banner
Cut a piece of canvas measuring 21-inches x 53-inches. Iron carefully (I can never seem to get wrinkles out of my canvas, but I wish you the best with yours) and fold the banner in half with wrong sides facing (right sides out), positioning the fold along the top. Mark the center point to help you position the appliqué pieces coming up.

Step 3: Prep the Pattern Pieces
Iron the fusible web to the wrong side of each of the fabrics you plan to use for the appliqué, then use a removable marker/pen to trace each shape onto the right side of your chosen fabric, then cut out. (Here, for some inexplicable reason, I opted to reverse the pattern pieces and trace them onto the paper on the back side of the fabric. If you go this route, just don't forget to reverse the pattern pieces. Otherwise the whole thing will end up backwards. The bottom line is—you can choose whichever you prefer!)

Step 4: Appliqué!
Peel the paper backing off the fusible web and iron each of the pieces onto the folded banner, carefully positioning the design in the center of the bottom half of the banner. (Fold the banner to help visualize the center more easily.)
Next, use your removable marker/pen to draw or trace the lines of the thumb and fingers.
Now we're ready to stitch! I opted for black, 12 wt decorative thread from Sulky and chose stitch 17 on my bernette79—but hey! You do you! You have choices—exercise them while stitching around the outside of each of the three pieces, being sure to stitch through only one layer of the banner fabric. (You'll need to unfold the banner fabric while stitching, incase that wasn't obvious. I've been there, done that. 🤣)
To finish, continue stitching over the lines you drew for the thumb and fingers. Feel your inner strength grow with each stitch of this appliqué pattern!


Step 5: Finish the Banner and Share it with the World!
With the appliqué stitching finished, re-fold the banner with right sides facing this time (insides out) and switch your stitch selection back to the standard straight stitch (or not—again, it's your choice!).
Then, starting about 4-inches from the top (the fold), stitch down and around with a 1/2-inch seam allowance. Be sure to stop about 4-inches from the top on the other side.

Reach through one of the open ends to turn the banner right side out and press.
Stitch around again, this time leaving a 1-inch open at the top, and using 1/8-inch seam allowance.
Insert the dowel, tie a string or ribbon to the ends, and display with pride in a place of prominence.


